Repairing Breech Face on Hammerli 208S

Uncategorized

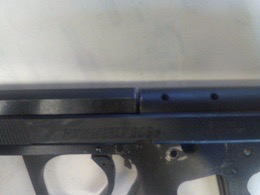
This is a guest post by Derrick Martin. If you have a similar problem with your Hammerli, feel free to contact Derrick at ask_derrick@aol.com.
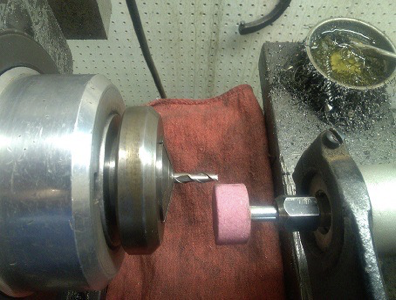
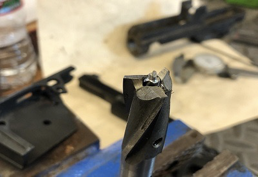
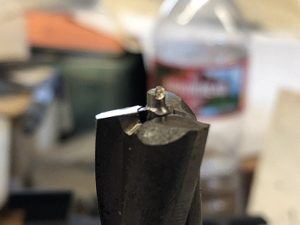
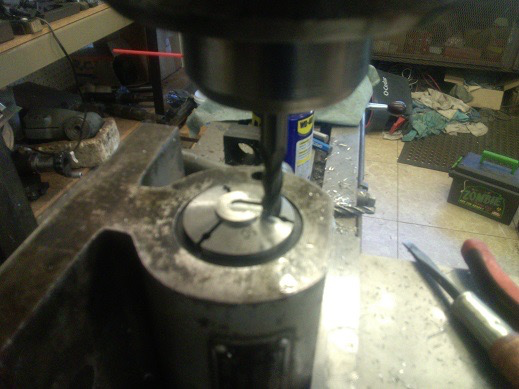
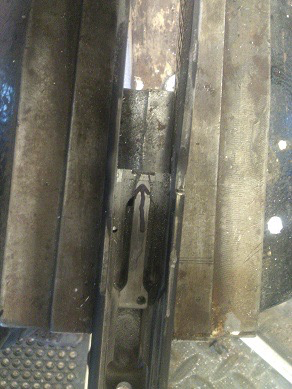
Note how barrel face and breech face have mirror images of erosion.

Before you start, take some photos of this area of your slide. Get several angles, as you will have to file the insert back into the original shape. This part of the slide will hit the feed ramp and prevent the slide from closing.

BREECH FACE CUTTER

I purchased 5/8” (.625) Piloted Counterbore, as it was largest fractional counterbore that would fit between slide rails. A suitable metric counterbore could be substituted as available. The counterbore had a 3/16”(.187) Pilot Hole, but I needed to use a 3/32”(.093) pilot. I used a 3/16 endmill and ground a .093 pilot on it.

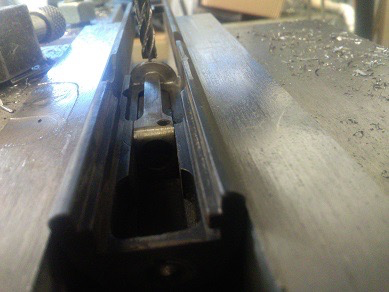
The Counterbore had a large radius around the Pilot Hole. I had to reface counterbore back to remove radius and then regrind cutting reliefs with die grinder, back into counterbore teeth.  Cutter reliefs were also ground into pilot teeth to ensure counterbore in breech face was carried thru to pilot hole.
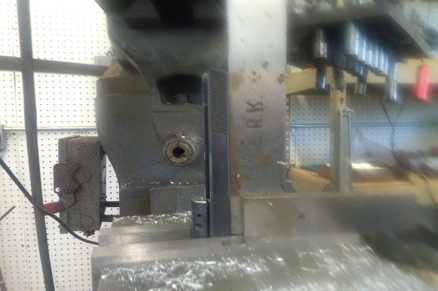
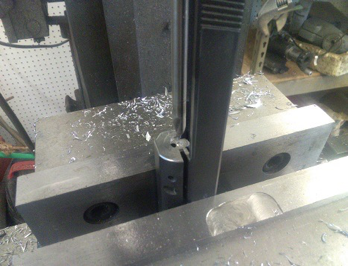
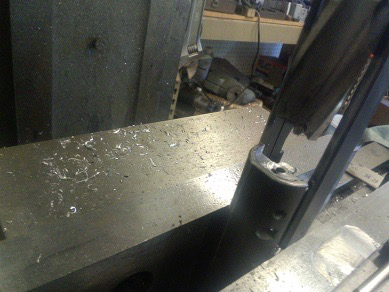
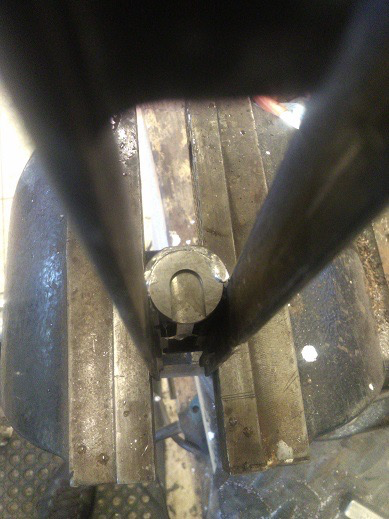
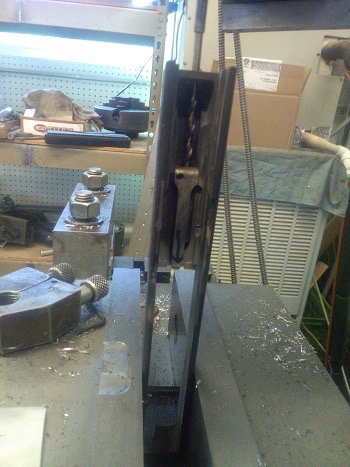
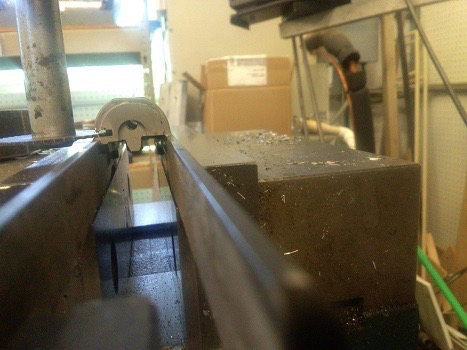
SLIDE SETUP IN MILL

Now comes some math and engineering.
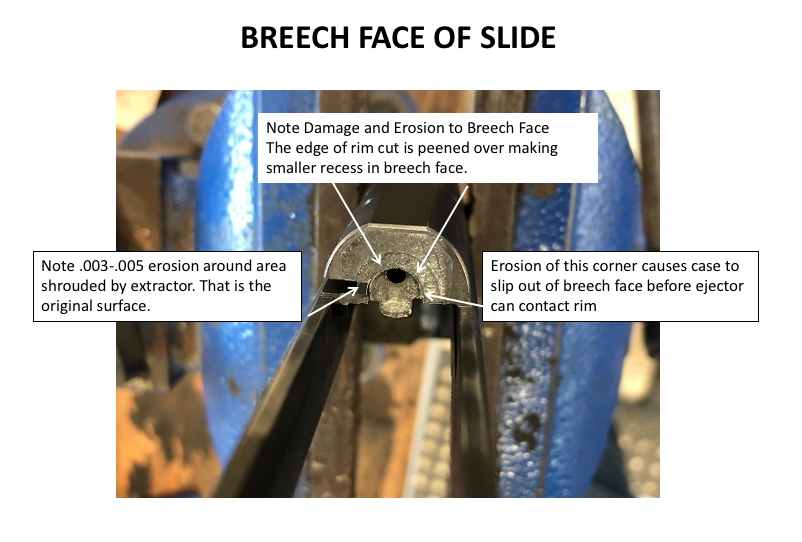
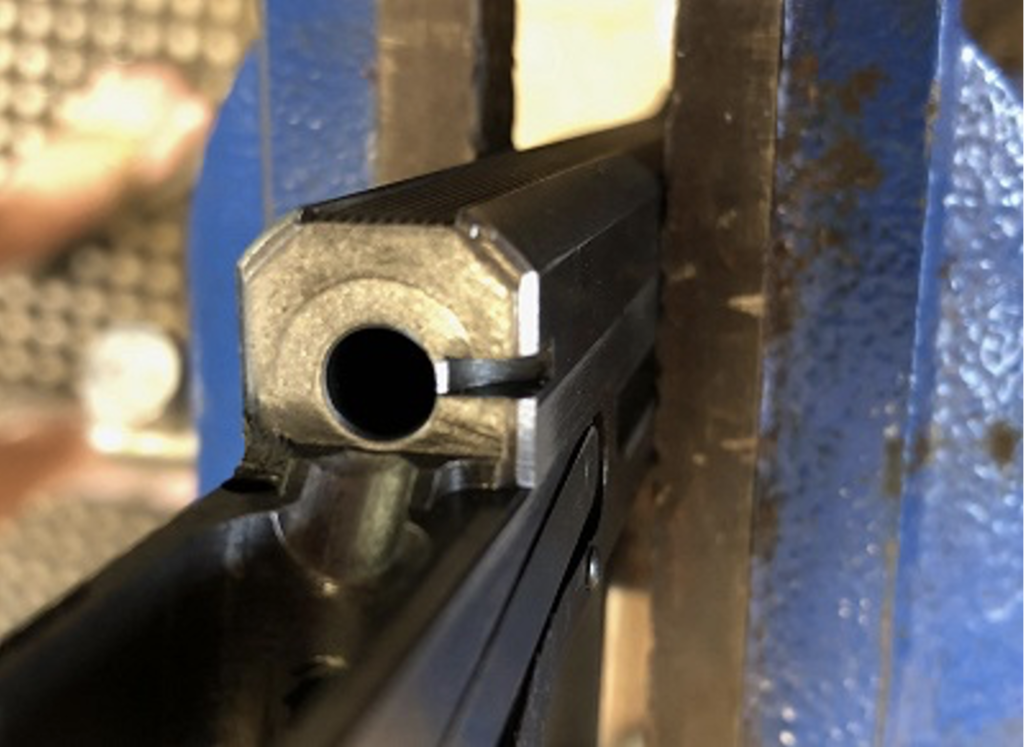
The rim of a 22LR case is .043” thick, we need to make an insert that has the .043 cut and enough material to support the case. I decided to make the insert .103 thick, and the counterbore .100 deep to allow for the .003 erosion of breech face and barrel face. I doubt it is critical, but it seemed to be right.
Getting the spindle centered on the breech face was a bit tricky. I tried centering on slide, but after finally getting it set up, I discovered the breech face was not truly centered in slide. I eventually held a 6” long ¼” drill in the collet, knowing it would not spin true, run out was about .005. I then touched off for depth, lowered table .005 and turned on the mill. Listening carefully, I could hear when the drill contacted each side of the breech face. I then split the difference for center and noted it was .0075 from each side.

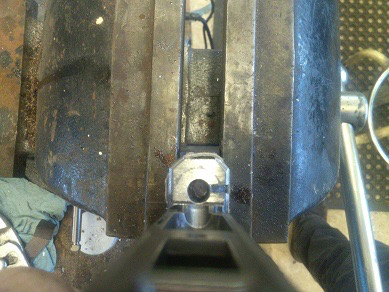
Lets verify some math, so you see what I did. Drill is .250, running out .005 for inscribed circle of .260. Rim cut in slide is around .275, so I could move table about .0075 to contact on each side. I could then contact at top of rim cut and come back .0075 to be centered in breech face.  This was when I discovered the center of the breech face was about .005 from the measured center of the slide. I measured slide at the top, so it could be warped/bent or not completely true in vise. Either way, I was now truly centered in the breech face.
Use a new, sharp 6” #3 centerdrill. Go slow and give it a chance to cut, so it doesn’t walk out from your careful setup. Use 6” .093 Aircraft Drill to drill pilot hole for counterbore. The pilot hole will be VERY close to the firing pin hole, so go slow and let it follow centerdrilled hole. The length of my pilot was .100, so if my insert is also .100, then this pilot hole needs to be .200 deep (or a little more).
Then install piloted counterbore and cut relief in the slide.
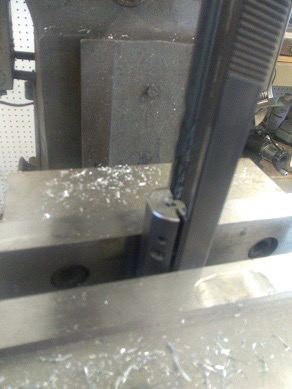
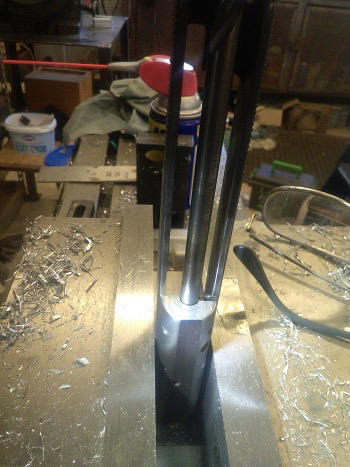
Use back gear and go slow, removing chips and oiling frequently. Make counterbore .100 deep.
Make the insert .0625 diameter x .103 thick with  .093 diameter Pilot .080 long.
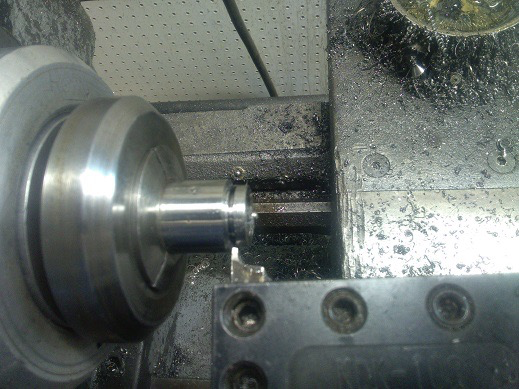
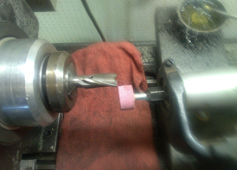
I used a piece of 416 Stainless, because I had it. Actual material isn’t too important, as long as it isn’t dead soft and it can be silver soldered.
I cut a 5C Soft Collet to hold the insert. Use a 7mm (.275) endmill to make the .045 deep rim cut to center of insert. Don’t go less than .045 for quality ammunition or you risk slam fires. If you plan on using cheap ammo, you can make it a little deeper (.047) to avoid slam fires, it might slightly effect accuracy, but then, you are shooting cheap ammo.
Use Brownell Force 44 Silver Solder to attach insert. Tin the recess and then install insert. Heat the slide, not the insert and use plenty of flux. Be sure sides of rim cut are parallel to the sides of slide.
Here is a “BEFORE” and “AFTER” of shaping the insert. Just make it match the inside and bottom of the slide.
Use .106 drill to redrill firing pin hole thru the insert. Go thru the safety hole in the back of the slide. My drill was too short and I had to make a sleeve to extend it. The safety hole in the slide is not drilled in the same plane as the firing pin, so be sure your extension sleeve doesn’t rub on the edges of the safety hole.
Recut extractor slot thru insert. Use existing slot in slide as guidelines for width and depth. Check to see extractor moves freely in slot, file/recut as needed.
Remember when I told you to take photos? This area is tricky. File it as close to your photos as you can. Then assemble slide on frame and check to see it closes fully. The insert will hit the feed ramp in the frame and keep the slide from closing. Use marking media (i.e. Sharpie, Prussian Blue, etc.) to identify areas to be addressed
If it looks something like this, you are done. Check firing pin protrusion, I recut shoulder on the firing pin to allow more protrusion. As long as it does not extent past rim cut in slide , it cannot hit the barrel.
I used a fine file to dress the face of the barrel. I didn’t try to remove all of the pitting and erosion, just enough to give the new insert in the slide an area to contact.

Derrick Martin is the former owner of Accuracy Speaks Gunsmithing in Mesa, AZ. He has 40 years experience in Competitive Shooting and Gunsmithing. He is retired now, but remains available in the shop for interesting projects. His email address is ask_derrick@aol.com 

Tags :
guest post,gunsmithing,hammerli
Share This :

Leave a Reply

Your email address will not be published. Required fields are marked *

Recent Posts

Have Any Question?

Please fill out the contact form and I will get back to you as soon as I can,

Categories